|
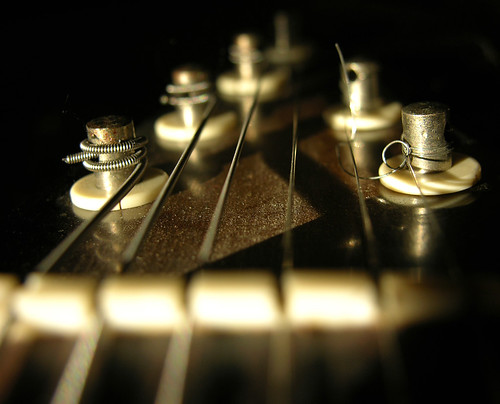
| PAF Humbucker Pickup on a Gibson Les Paul (Photo credit: Wikipedia) |
My first electric was a Tiesco Del Ray I got for Christmas in 1967. I did get a Mattel Tiger guitar that was made of plastic and used a contact type pick-up. My brother and I each got one that XMAS so often times we’d use one of the pick-ups as a vocal mic.
Those days’ electric strings were extremely limited in types and gauges available to young poor city folk like yours truly. I think I only remember Gibson, Fender and Black Diamond strings. This is before the Maestro Fuzz and the Vox Wha-Wha were available to the buying public like me. Back to pick-ups!
With the limited info as to how the stars were getting “THAT SOUND” we just kept trying to learn guitar without “how to” magazines and poor sounding phonograph players playing 45’s on a tiny speaker. You could say there was no reason to discern between p/u’s.
In the mid 70’s I was already playing full time and knew about vintage Les Pauls and the legendary PAF pick-up’s that were installed in them. Around that time an N.Y. Co. was making a name for themselves as a replacement for your non- Gibson brand type (humbucking) pick-up, DeMarzio. I ended up buying one for my 76 Explorer. Mind you I owned since the mid 60’s, a late 50’s Epiphone symmetric cherry finish Coronet with a, I think someone called it a cobalt pick-up. It is referred to as the “P-90”, or “soap bar” single coil type pick-up. I loved that guitar and its sound. I just thought I should have a “real vintage” sounding guitar with a humbucking p/u installed. I also owned a Les Paul Deluxe with the mini humbuckers. It sounded great, I just thought it should have full sized p/u’s to sound and look right. To quote Ian Hunter in the mid 70,s, “Rock guitarist’s seem to have this Gibson fetish”, and I did! I wanted the “look”.
Gil Pini, the other Guitarist playing with me was using the DeMarzio super Distortion humbucking , and I for some reason didn’t feel good about its sound and feel, although it was touted as “heaven sent “ sort of thing, especially for Marshall amplifiers back then (no master volume on the pre-amp stage). I eventually purchased a Super 2 p/u, because it had more bite. And to me, meant, it would cut through cleaner and not be as transparent in the mix. I even bought the Alembic ‘Hot Rod Kit” for my 56 Les Paul Jr. (stupid) in 1976 or 77. That was supposed to be a good idea because it was hotter (better sounding) with a ceramic magnet to install, and since it was from Alembic (from California) and not some “upstart p/u manufacturer” it was the right thing to do. I didn’t think about the DeMarzio pick-up’s and I didn’t know that those pick-up’s used the ceramic magnets at the time.
As I started to record in major recording studios I’d learn to discern my sound. I didn’t have those how-to magazines to hip me to that elusive vintage “sound”. Yet, I could hear my Gibson Explorer and my Les Paul Jr. distorting at all volume levels as well as attack approach. It just wouldn’t smooth out. I was puzzled. Still trying to connect the look with the sound, I stumbled through the maze for years.
Not having the patience, or the money to buy and compare p/u’s, I just tried to make a sound with what I had. I had all the right Pro equipment. Yet I was looking back, “wagging the dog”.
A good sound starts from the fingers to the guitar to the P/u’s. If you don’t start there, you’re spinning in circles and you’ll end up with a transparent (fuzzy) sound without body and response. “Your fingers are your tone generators”. Not the amps or pedals. Those are tools to augment your expression. And if you learn anything about troubleshooting on the fly, you go down the line to find the problem with your sound or rig. The same goes for finding your sound. When establishing your sound you start with you, through the pick-up on down to the amp. With troubleshooting on stage, you should start with the amp and go down the line back to you. Which makes sense since you’ve established your rig set up, and you’re trying to fix what was working, you backtrack. If not, you’re spinning in circles, again!
So, I had a friend who made the point about how some pick-up’s play you and PAF’s don’t. I soon tried two 57 Classic pick-up’s installed on my 92 Les Paul Classic and what do you know? I had a sound that was tight on the bottom ringing on the top and honking clear/dirty mids when I played hard, and subtle soft tones when I backed off the and played lightly. I was in HEAVEN!! And the great thing that went with it was that this same thing happened regardless of the volume setting on the guitar.
My experience was that the tone I got on full could be bright and tight with a honk, and as soon as I backed off the guitar’s volume, the tone would take on a dark or dull shade. This meant I would spend a lot of time tweaking the blend between my rhythms (clean and crunch) and lead tones. Looking for each was a drag and a waste of time!
I’m no tech. so I can’t and won’t waste your time with my take of their specs. I do know that there’s something about the combination of the enamel coated copper wire and the alnico magnets that give me a sound I can play with and use dynamics. It was soon after I started using the Gibson 57 Classic pick-up, that Gibson came out with their 57 Classic plus. This p/u was designed as a bridge p/u.
In the 50;s the gals at the pick-up dept. would wind these pick-up’s using an egg timer or something like that. Sometimes they’d be distracted and some pick-ups would end up with more winds. Other times they would end up with less.
The p/u’s with more sounded “hotter” and when people started going for the tone, they’d notice the sound of certain pick-ups compared to others. It wasn't rocketed science to come up with the idea to put one of those “hot” pickups in the bridge position you would have a bright, tight, and honk’n lead tone where there wasn’t. And a whole new submarket in ‘vinatge' pick-up’s ‘ came about.
Which brings us full circle, “I use Gibson Pick-ups and I’m sure that the other brands quality alnico pickups are a good sounding product. I do know what sounds good to me and what I know from “my” experience. I’m a guitarist who’s been around the block and my ears have a sense as to what a pickup should sound like, that’s what I go for all the time.
Make your self happy and keep the communication’s open!