Showing posts with label Oboe. Show all posts

Sunday, October 18, 2020

Beginner OBOE - Choosing an Instrument

An oboe
An oboe (Photo credit: Wikipedia)
For a beginner oboe player, the first step in the learning process is a rather obvious one, - to purchase an instrument to play on. There are a number of issues to consider in making the ideal choice. These could probably be divided into three main issues; - the type of instrument, the cost of the instrument and the make of instrument.

THE TYPE OF INSTRUMENT: There are two main fingering systems for the oboe. These are the "Thumb-Plate System" and the "Conservatoire System". Most of the fingerings are identical but there are just a few differences around the C & Bb fingerings in the middle of the instrument. I am not going to go into further detail over this here. Your best bet is to consult a player who will be able to demonstrate the two systems. In the UK the vast majority of players use the Thumb-plate system whereas on the Continent of Europe most use the Conservatoire. Each country tends to have its own 'school' of oboe playing which will focus on one or other of the systems. Ultimately, it doesn't really matter as both systems have their strengths and weaknesses. You will find that people who play on the Conservatoire system claim that it is the better one and those who play on the Thumb-plate make a similar claim. If you are having lessons with a teacher let he/she guide you.

Some of the popular professional oboes now have a combined system which incorporates both finger systems on the one instrument. If you are a beginner oboe player, you are highly unlikely to be playing on such an oboe.

There is also the issue of the instrument quality to take into consideration. Some of the pointers here will be covered by the sections below, but there are different levels of instrument, i.e. - student models, intermediate models and full professional models. The difference between the cheapest of these and the most expensive runs into thousands of pounds/dollars.

THE COST OF THE OBOE: This is a tricky one as the Oboe is significantly more expensive than either the flute or clarinet. Instruments in the UK range in price from around Pound 1000 for a good student instrument to about Pound 7000 for a professional instrument. Always go to a reputable oboe or woodwind specialist to purchase an instrument and not just go for the cheapest oboe you can find on eBay or you are likely to end up with an instrument of highly dubious quality. The oboe is demanding enough to play even when you have a good instrument. If your oboe is poorly made it will be a nightmare to play.

Many of the specialist retailers will have hire schemes of one kind or another which will allow you to try out an oboe for a trial period before making the final purchase. Until you start to play you can never be sure whether you will take to the instrument or not. There will also be financial arrangements to allow you to spread the cost. Schemes such as this will only usually be available through the 'good' specialist shops. These arrangements can be very helpful to a beginner oboe player.

THE MAKE OF INSTRUMENT:The makes of oboe you will find available will depend on where you are in the world. Here in the UK we have, Howarth of London, who manufacture a whole range of instruments from student to full professional. Their instruments are excellent. Other oboes readily available in the UK are Loree, Marigaux, Ward & Winterbourne, Buffet and Yamaha, all of which are quality instruments. If you live elsewhere investigate available instruments and check their relative merits.

A final word on the purchase of an oboe, if you don't know exactly what you need then ask someone who can give you informed and unbiased advice. For a beginner oboe player you simply must have a good instrument to start on or you will find the whole experience of learning very dispiriting.

    Robert Hinchliffe is a professional oboist, composer, teacher, conductor and music director. This article is based upon over 35 years of both playing and teaching the oboe. If you have found this article helpful and would like to know more, please visit http://www.oboeplaying.co.uk.
    Article Source: EzineArticles


Monday, October 15, 2018

Helpful OBOE Tips and Stories!

An oboe
An oboe (Photo credit: Wikipedia)

The oboe can be a very difficult instrument to play. This is because it changes on a daily basis. For example, if you are used to playing in warm rooms, and you suddenly must play in a cold one (and visa versa), adjustments must be made. Here are a few (hopefully) helpful tips I have come across in my experience playing. These tips are assuming you have a decent familiarity with the oboe and how it works.

Do Not Over-Soak Your Reed!
When I was about 12 years old I remember a perfect example of what you are not supposed to do. My private instructor was the instructor of about 15 other students on different instruments. Once a season we would have a recital showcasing what we were taught. I had not been playing the oboe for long, and while she told me warned me of this exact tip, I still was unaware of how long I was actually soaking my reed. It was my turn to perform. I believe I was playing an excerpt of Marcello's concerto. The accompanist started, and when I came in it was just awful. I looked over at my instructor but continued to play the entire piece. I could see the look in her eyes -- pity. My reed was so over-soaked it barely made a noise, just enough of a noise to be considered playing. Luckily, the lesson was learned there and not in, say, an orchestra rehearsal. The point is, in many cases, do not soak your reed for more than 5 minutes. Of course, reeds will vary, some soaking faster than others.

Breathe With the Beat
A common hardship of the oboe is making a good entrance. If there is not enough breath support when it is your time to come in, the sound will be delayed and/or sound sloppy. One way to combat this and ensure you are coming in with the right tempo is to simply breathe the last beat of rest before you enter. Also, showing your breath allows others to see, and everyone will be more likely to enter correctly and simultaneously. What I mean by "show your breath" is move when you breathe. Make sure everyone around you sees your breathing but without looking over-the-top.

You Can Never Swab Your Oboe Too Often
Swabbing your oboe when you are not playing is key to not having your keys filled with water (technically it spits, but people just like the nicer version -- "water"). Some novice instrumentalists think that swabbing your instrument out should only be done when you are putting it away for the day. This is simply not true. Swabbing your oboe out wipes away that trickle of water that could lead right to a keyhole. Sometimes, oboist uses a huge feather as a swab. This works well in orchestra conditions because it tends to be a faster method. Silk swabs are preferred otherwise because little pieces of a feather can sometimes get stuck and silk swabs produce little to no lint.

Have More Than One Good Reed
Reeds come and go quickly if you practice and perform a lot. Having more than one backup is best. In fact, some oboist prefers to have 3 to 4 equally good reeds that they rotate evenly. This tends to make them all last longer. On the other hand, some performers tend to have a reed for every occasion. For instance, I know people who have a "2nd chair reed," a "soft reed," a "loud reed," and a "solo reed." Regardless of which choice is best for you, keep many reeds on hand. Who knows what could happen? A careless clarinettist could side-swipe the stand where your reeds are laying and could send them flying towards the principal flautist!

    By Jo Kro
    Jo Kro has been playing the oboe for almost 11 years and has been in a few orchestras including The Charlotte Symphony Youth Orchestra. 
    Article Source: EzineArticles


Friday, September 21, 2018

A Special Note to Band Directors About OBOE REEDS

English: Drawing of a double-reed mouthpiece f...
Drawing of a double-reed mouthpiece for an oboe. (Photo credit: Wikipedia)

Let it be known that I like band directors and that without mine long ago I would not be sitting here writing about what I know about the oboe.

He was (and probably still is) a wonderful man who encouraged me, taught me what he knew but then was humble enough to say that he could take me no further. He recommended a professional oboist in town so I could continue learning the things he could not teach me, and I am forever grateful.

So, you could say I have a great deal of respect for band directors.

I know they are teaching a lot of kids a lot of different instruments, and there is no way anybody can be an expert on all of them. I give them credit for trying!

But there's something that has been coming up a lot in my teaching and even when fielding reed questions that has been bothering me. And although I am sure band directors aren't the only ones to "blame," that's where I am starting to work towards a solution.

The problem seems to be in advising the young band oboists in the selection of oboe reeds. Now, many a band director has bought handmade oboe reeds from me, so there are exceptions.

But to the majority out there, do you know how much easier teaching the oboe would be if you handed out handmade oboe reeds instead of fibercane or even those awful profiled music-store reeds?
The reason is plain and simple.

These reeds do not encourage good habits and make the oboe difficult to play, more difficult than it ever needs to be.

The idea I keep hearing is that somehow, good reeds are reserved for good students... but that is completely wrong. A good, handmade oboe reed should be provided for every beginning oboist on their very first day of playing the oboe.

Talk to a professional oboist and see if they can work with you in making reeds that young students can handle, or consult a professional reedmaking company (yes, like MKL Reeds) that can work with these requests.

Although we need "labels" on reeds so that we all know what we are talking about, these labels are perhaps the least helpful part of all of this. Find a place that can make reeds for beginning students, and that should be pretty much all you need to say.

I am on my soapbox lately about all this "hard, medium hard, soft" stuff!! There is also this very large misconception out there that once a student has been playing for more than a year they need to "graduate" to a "harder" reed... and by the time they have been playing a while they are being handed these "hard" reeds they can't even play!

I just don't understand where this all came from, thinking that increased ability on the oboe somehow means you should make it harder for someone to actually play.

Now, it's not entirely the fault of a band director. And the situation is not exactly helped by machine-made reed manufacturers that are labeling their reeds in this way either.

Here's my take on it:
An oboist needs a reed he can play, NO EXCEPTIONS!!

Buy oboe reeds for your students that are handmade and are not classified in this way, unless you can talk to someone and explain what you need.

What a more advanced student needs in a reed is resistance, which is much different that hardness. So, stop handing them hard reeds once they pass the year mark, and especially when they seem like they are struggling.

Unless you can scrape these reeds down for them, they should not be encouraged. Better yet, get reeds from a professional oboist because these will make your job easier and it will make your students improve faster and probably enjoy playing a lot more.

I can't imagine how hard a job it is to be in your shoes, but think of the amazing start you can help give to each and every kid that chooses to play the oboe.

    By Maryn Leister
    Oboist and entrepreneur Maryn Leister helps beginner, intermediate and professional oboists become happier oboe players.
    She is an owner of the oboe learning company MKL Reeds and publisher of the Reed Report and Oboe Success Tips Newsletters. Each newsletter is full of straightforward tips on becoming a better oboe player and on taking control of your oboe reeds.
    Get your free subscription to the Reed Report newsletter and start your own journey towards a more rewarding oboe future right away. Sign-Up now and get your FREE Oboe Reed Tips
    !

    Article Source: EzineArticles


Wednesday, August 22, 2018

OBOE MUSIC for Beginners (Part Two) - Review of easy pieces with piano parts

Deux musettes du "Cantigas de Santa Maria...
Deux musettes du "Cantigas de Santa Maria" (Photo credit: Wikipedia)
In addition to the necessity of a good oboe tutor book, it is important that young oboists get the opportunity to play rewarding yet accessible pieces, preferably with a piano accompaniment. This second article on oboe music for beginners looks at pieces which fall into this category. To be able to stand up in a school assembly or school concert and perform a rewarding piece of music is a highly motivating experience for most young oboe players. Playing the oboe is not an easy skill so anything which inspires young oboists will make them feel that the effort is worthwhile.
There are a number of good publications around containing appropriate music for such occasions; some of the material is original and some of it is specially arranged. It is from this range of material that the exam boards draw their list A & B syllabus too. There are a number of books of oboe music for beginners which I have found particularly useful over the years and which are to be found on both the Associated Board and Trinity Guildhall exam syllabi.

“The First Book of Oboe Solos” In my early days of teaching, this was far and away the best book of early oboe pieces available. The mixture of original and arranged music is very well presented and the majority is interesting to young oboists. A couple of fairly easy pieces opens the book but it soon moves on to more advanced material of Grade 2 to 3 standard.

“The Second Book of Oboe Solos” This is a sequel to the above book and, therefore, not really appropriate for absolute beginner oboists. It takes the approximate standard up to about Grade 5.

The Really Easy Oboe Book” This collection of 20 progressive pieces was written to meet the demand when, about 20 years ago, the introduction of Grades 1 & 2 for woodwind instruments created a need for new appropriate repertoire. The pieces are all original and in a mixture of styles. The piano accompaniments are all easy to play for ‘non-specialist’ pianists. This book is widely used by both the AB and Trinity Guildhall boards.

“Learn as you play oboe” & “Abracadabra Oboe” Both these books are actually tutors but contain accompanied pieces used by the exam boards. In “Learn as you play oboe” there are 3 sets of pieces for which piano parts are available. In “Abracadabra Oboe” there is a book of piano accompaniments available for all the material in the book. For users of these tutors, the accompaniments are a very useful addition.

“Three Elizabethan Pieces” This set of three short pieces is a gem. The pieces are all perfect for young oboists and it is not surprising that they have found themselves on to the syllabi of both exam boards.


“Nine Short Pieces from Three Centuries” & “Oboe Music to Enjoy”These are both very good collections of pieces nicely arranged and both are used by the exam boards.

“All Jazzed Up for Oboe” For those who like a more contemporary slant to their repertoire, this is an excellent book. It adds a valuable source of lighter music to the repertoire of oboe music for beginners. The problem with jazzy pieces is that the rhythm patterns are often a bit tricky but with many young oboists facing jazzy repertoire in woodwind ensembles and wind bands these days, learning the idiom fairly early on in their oboe playing career is very important.

The above repertoire of oboe music for beginners is material which I have found particularly helpful myself. As I said earlier in the article, good, interesting, well-written music is motivating for young oboe players and gives them a great feeling of achievement. To be able to stand up in public or in an exam room and perform enjoyable music with confidence is probably the most inspiring situation for any young oboist; it makes them want to go home and practise for the next opportunity.

    Robert Hinchliffe is a professional oboist, composer, teacher, conductor and music director. This article is based upon over 35 years of both playing and teaching the oboe. If you have found this article interesting and would like to know more about the oboe, please visit http://www.oboeplaying.co.uk.

    Article Directory: Article Dashboard


Tuesday, August 21, 2018

OBOE MUSIC for Beginners (Part One) – A review of Oboe Tutor Books

An oboe
An oboe (Photo credit: Wikipedia)
When I began to play the oboe back in the late 1950’s, my teacher started me off with Otto Langey’s book, The Oboe. Although not ideal oboe music for beginners it was all that was available. Since that time a number of alternatives have become available, - some are learning methods and some are books of pieces for young players.

As an experienced player and teacher of the oboe, I have used a variety of material in oboe lessons over the years; - some of it is still available and some not. In this article, I will review the books that I have found particularly helpful and which, to the best of my knowledge, are still available today.


“A Tune a Day for Oboe” When I first began to teach in about 1972 this was the book most widely used, indeed it was one of the very few books of oboe music for beginners around at the time. It is still available although not used as often as it used to be. It is a fairly comprehensive book made up of a part tutor, part study book, and part easy pieces. The order in which the notes are introduced is a little questionable in my view but there is a nice balance of exercises and tunes used for each new note or technique introduced. The tunes selected are a mixture of the familiar and the unfamiliar which is good. Some of the tunes in the first half of the book are in duet form, with a second part for the teacher to play. Some of the later music is arranged in duet or trio form for a group of students to play. “A Tune a Day” does have quite a lot to commend it but I always found it a slightly dull book, both for student and teacher.

“Learn as you play oboe” This book dates back to 1980 and quickly took over from “A Tune a Day” as the most used of the oboe tutor books. There were a few others which cropped up at about that time as I remember, but they quickly sank without trace. The approach of this book was fairly similar to “A Tune a Day” but with the addition of three sets of Concert Pieces for which piano accompaniments could be purchased. These pieces quickly found themselves on to the Associated Board syllabus at appropriate grades. This book was followed up by a book of First Repertoire Pieces (with piano accompaniments) which also found their way on to the exam boards. My assessment of this book is very similar to that of A Tune a Day in that it is rather dull and uninspiring. Also, the sequence in which the notes are taught is not entirely to my liking.

“Team Woodwind” I am not, and never have been a fan of any kind of band method. It is a concept which does not sit easily with me. I have included this book in my appraisal of oboe music for beginners as I know that some teachers like this particular approach or are pushed into it by circumstances. I have always believed that we begin by working in like-instrument groups (i.e. - with other oboes) before branching out when we are ready into woodwind ensembles and, later, bands and orchestras. Putting different woodwind instruments together too soon I feel is a mistake! “Team Woodwind” is a well-produced book with a reasonable collection of material but it is not for me.


“Abracadabra Oboe” When it came on the market back in 1990, Abracadabra Oboe was the book I had been waiting for since beginning to teach. The sequence in which the notes are taught is absolutely spot-on and the balance between learning material and tunes is excellent. There is also a very good balance between known tunes and the unfamiliar. The only shame is that this book did not materialize 20 years sooner. Material from this book has, not surprisingly, been adopted by the exam boards for the earlier grade exams too which makes it an ideal choice for beginner oboe players.

The three key issues in any oboe tutor must be:

1) The introduction of notes and techniques must be in a logical and helpful order.

2) The layout must be attractive to the eye of the beginner oboist.

3) Most important of all, the book must inspire and motivate young oboists to practice and, therefore, progress.

So, when assessing oboe music for beginners, in my personal opinion, based on many years of both playing and teaching, Abracadabra does all these three things in a way which no other oboe tutor does and provides an ideal starting point for anyone who wishes to learn to play the oboe.

Robert Hinchliffe is a professional oboist, composer, teacher, conductor, and music director. This article is based upon over 35 years of both playing and teaching the oboe. If you have found this article interesting and would like to know more about the oboe, please visit http://www.oboeplaying.co.uk.


Tuesday, July 10, 2018

A First Look at the OBOE

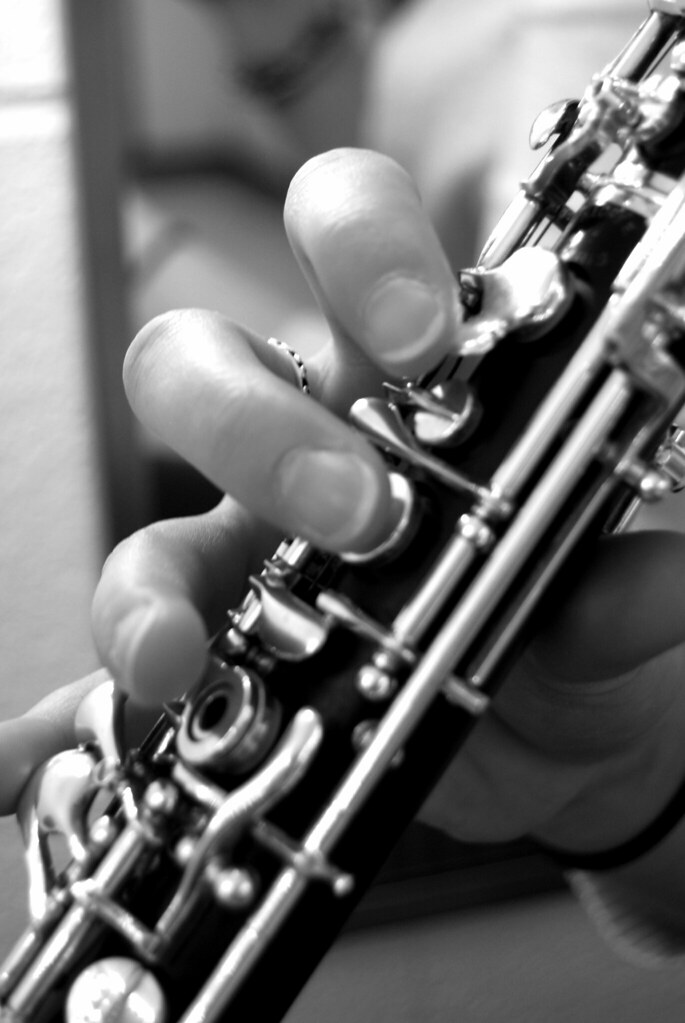
A Musician's Fingers
Oboe - Photo by Ksayer1 
If you are just learning about the oboe, you are about to learn that there is a lot to learn!

While this article is by no means an exhaustive look at the oboe, we'll try to cover the basic stuff to give you a better idea of this beautiful instrument.

The oboe is a double reed (which means that two pieces of wood vibrate together to make the sound) instrument that is directly descended from the 16th-century shawm. While the shawm might be considered the great-grandfather of the oboe, its sound (which was LOUD and annoying) changed quite a bit before it became the modern day oboe.

Oboes are usually made of grenadilla wood, but sometimes, in an effort to produce slightly different tone colors, other woods are used. The oboe has sterling silver keys and is made up of three "joints:"
  • a lower joint
  • an upper joint 
  • and a slightly flared bell
The sound is produced by using a reed made of two blades of cane which vibrate together.

Pitched in "C," the oboe's pitch range starts at the Bb below middle C on the piano and ends roughly 2 ½ octaves above that, around a G. For the adventurer, higher notes are possible though less comfortable and less frequently called for in music written for the oboe.

The oboe has a narrow conical bore, making its timbre focused and penetrating. The French word for oboe, "hautbois." Hautbois literally translates to "high-," "strong-," "loud-," or "principal-wood," depending on its various spellings. Some people say that the oboe sounds a bit like a duck. Track down a recording of Prokofiev's Peter and the Wolf for a great example of this.

The oboe is often played in groups of two or three in orchestras and bands and is used in many combinations for chamber music. It is primarily a melody instrument and, because of its lyrical and mournful timbre, is often used for very emotional sections of music.

Good examples include:
  • Stravinsky - Symphony in C
  • Barber - Summer Music
  • Gabriel's Oboe
One of the oboe's most important jobs is that of "tuner" in an orchestra. Listen carefully to the beginning of an orchestra concert with oboes in it and you will hear the oboe player play a tuning "A" from which the entire orchestra takes their pitch.

There are actually 4 different instruments within the oboe family, which cover the soprano, alto, tenor, and bass ranges. The oboe itself is the most soprano of its direct family. The second most common instrument in the oboe family is its tenor version, the English horn.

The English horn, or "Cor Anglais," is pitched a 5th below the oboe, in "F," and is fingered almost exactly like its smaller sibling. The range of the English horn begins at a written B below middle C and goes up to about concert "C." Like the oboe, it consists of an upper and lowers joint, but it has a bulbous bell at the lower end which makes it look quite different. English horn players also use a bocal, onto which the reed is attached.

The sound of the English horn is similar in quality to the oboe, but because it is larger and lower, its timbre is a bit more mysterious and sorrowful. The English horn is often used in the band and orchestra, though less often in chamber music. It is quite common for the 2nd oboist of an ensemble to have to "double" on English horn, having to switch back and forth from the oboe as his/her part dictates.

Famous English horn solos include:
  • Rossini - William Tell Overture
  • Dvorak - New World Symphony
The oboe's alto family member is the oboe d'amore, which means "oboe of love." This instrument looks like a small version of the English horn, with the same bulbous shaped bell and curved bocal. It sounds a minor 3rd lower than the oboe, is pitched in concert "A," and again fingered almost exactly like the oboe.

The oboe d'amore's sound is truly distinctive, being reminiscent of its soprano and tenor relatives, but more muted and sweet. It is often used in pairs and most frequently in Baroque music, especially that of J.S. Bach. Check out the beautiful solos and duets for oboes d'amore in the following Bach pieces:
  • B Minor Mass
  • Christmas Cantatas
  • Concerto for Oboe D'amore
The oboe d'amore does not often appear in ensemble pieces after the Baroque era, though one of its most famous orchestra solos was written by Ravel, in Bolero.

The oboe's bass family member is the Bass oboe, which is the most obscure of the oboe family members. The bass oboe is pitched in "C," like the oboe, but sounds an octave lower than its written pitches. It looks like a very large English horn and is played with the same fingerings, but its bocal is more drastically curved.

The popularity of the bass oboe was brief and is rarely used today. One of the few orchestral pieces which employ the bass oboe is Holst's The Planets. Its murky and atmospheric timbre is well suited to a piece about outer space.


The oboe and its relatives all use a double reed, but the reed is different for each instrument. Basically, the bigger and lower the instrument, the bigger the reed is. The oboe's reed is the only reed with an attached cork, the others being on metal tubes which slip directly onto a bocal. From its soprano to bass ranges, the oboe family covers a wide spectrum of tones colors, though remains lyrical and poignant in all its versions.

The oboe is a beautiful instrument to play although it can take quite some time to master. Even producing a sound can be quite a challenge for a beginner.


    Oboist and entrepreneur Maryn Leister helps beginner, intermediate and professional oboists become happier oboe players.

    She is the owner of the oboe learning company MKL Reeds and publisher of the Reed Report and Oboe Success Tips Newsletters.  Each newsletter is full of straightforward tips on becoming a better oboe player and on taking control of your oboe reeds.

    Get your free subscription to the Reed Report newsletter and start your own journey towards a more rewarding oboe future right away.  Sign-Up now and get your FREE Oboe Reed Tips!

    Article Source: EzineArticles - A First Look at the Oboe


Wednesday, May 30, 2018

LEARNING OBOE - 5 Essential Techniques

English: Niels Eje with oboe
Niels Eje with oboe (Photo credit: Wikipedia)
As with the studying of any musical instrument, learning oboe is all about technique. There are a number of technical aspects related to playing the oboe which needs to be understood and applied if you are to become an oboist. The human body was not designed to play musical instruments. Instrumental technique is, therefore, the way in which we overcome the body’s resistance to what we are forcing it to do.

This article is aimed especially at oboe for beginners and will explore five particular areas which need to be carefully developed. These are Posture, Breathing, Embouchure, Tonguing, and, finally, Hand & Finger Position. Both the understanding and application of these aspects are vital when learning oboe.

Posture Good posture is the basic foundation on which everything else is based; - bad posture = bad oboist! Good oboe technique requires that the feet are about shoulder-width apart with the weight evenly distributed. The head should be upright and the oboe raised to an angle of about 60 degrees.

Breathing This is the most important single technique of all, especially as we are looking primarily at oboe for beginners. Breathing must always be from the diaphragm, not the chest, and breaths should always be taken through the mouth, not the nose. Shoulders should remain level and relaxed throughout and not lifted. Slight dizziness is experienced by some young oboists as their bodies get used to the deep breathing so important to oboe playing.

Embouchure This is the term we use for the way we form the mouth when playing. The oboe embouchure always looks very tight to the unknowing eye, but, in fact, is very relaxed around the reed. The pulling back of the lips is simply to bring the muscles around the edge of the mouth into contact with the reed. The oboe reed cannot be controlled with the red part of our lips. Beginner oboe players often experience a slight burning sensation in their cheeks. This is just muscle tiredness.

Tonguing on the oboe produces a clear and precise start to each note. The tongue touches the tip of the reed and interrupts the air flow. As the tongue pulls away, as if pronouncing a “Tuh”, it allows the air to rush into the reed making the cane vibrate and producing the sound.

Hand & Finger Position This is very important for young oboe players when their hands are still rather small. If you let your hand hang passively at your side you will see the hand at its most relaxed with the thumb straight and the fingers slightly curved. This is the shape we are trying to replicate when playing.

So, as with any instrument, learning oboe requires a methodical approach which puts the acquisition of good technique first. Although this article gives a brief outline of the basics of playing the oboe, I would recommend a proper course of oboe tuition with an experienced oboe teacher. This is especially important for young oboists.

If you can develop fully the techniques necessary and learn to play the oboe well, you will have a skill which will enhance your life as a player of one of the most beautiful of all musical instruments.

    Robert Hinchliffe is a professional oboist, composer, teacher, conductor, and music director. This article is based on over 35 years of both playing and teaching the oboe. If you have found this article helpful and would like to know more, please visit http://www.oboeplaying.co.uk.

    Article Directory: Article Dashboard


Sunday, May 6, 2018

DENTISTRY and the MUSICAL INSTRUMENTS You Play

oboe performance
Oboe Player - Photo by liberalmind1012 
Before your child starts playing a kind of musical instrument, particularly a wind instrument such as a clarinet or saxophone, a New York orthodontist strongly recommends that you check first with your dentist. The dentist said that faulty alignment of teeth and gum difficulties are among the dental problems that certain individuals have because of the instruments that they play. He said in a report published in a recent issue of the Journal of the American Dental Association that millions of American children are playing some kind of instruments they selected themselves or are studying music in schools using instruments that may have been assigned to them on a haphazard basis.

There are just certain instruments that are not suited for children dentally or temperamentally, and this would be later on discovered by the children. Many would be a musician is handicapped from the start and will never be any more than mediocre in his field. Dentists who want to provide good service for their patients must remember to tell would be musicians, music teachers, and parents that some dental problems are caused by the playing of wind instruments.

Before the parents invest time, effort, and money to this musical pursuit, a dental consultation should be done first. There are a lot of dentists who claim that single reed instruments are usually to blame for cases of body tissue illnesses experienced by wind instrumentalists. The lower lip is supported by the teeth, and unfortunately, it is also here that a lot of weight from the instrument is applied. Applying pressure on the teeth reduces the blood circulation in the affected bone area.

The upper teeth may also be misaligned due to the pressure exerted by the lower jaw onto the upper teeth. Compression of the lips against the upper and lower teeth is the result of playing brass instruments like a trumpet. Tooth mobility may come as a result of playing these instruments for extended periods of time. A short upper lip prevents a person from playing the flute well and comfortably, while irregular teeth cause a person's lips to hurt while he is playing the oboe or bassoon.

Dental problems may arise because of string instruments also. Certain studies indicate that faulty bite is a common problem of violinists since a lot of pressure is put on their jaw when they play. These dental problems can be prevented if an oral examination is given to would be musicians. Proper early recommendations can ensure dental suitability and oral health so that a would-be musician is not needlessly handicapped in playing his or her favorite musical instruments, he said.

Getting check-ups before anything else is definitely a great way to make sure you don't get complications in the latter stages of life. Seeing your dentist beforehand is especially true when it comes to playing wind instruments. Seeing a dentist is never a bad thing.

<7center>


Thursday, December 7, 2017

Don't Make OBOE REEDS in a Bubble!


As I say time and time again, making oboe reeds is often an experiment, and changing one variable at a time will provide you with a cheap education and useful clues to improve your reedmaking results.

Even though it is important you change only one variable at a time, always keep your EYE on the bigger picture and be thinking, analyzing and scheming about other ways to solve your problem.

In other words, while you have one "experiment" going (like trying a new shape to see if it helps bring down your pitch a little bit), use your detective skills to view the same problem from a different perspective and work to solve it in a less technical way.

I suppose you could just try one equipment experiment after another and hope to solve things that way, but I always like the "detective on overdrive" approach and leave no stone unturned when searching for a solution. I do my best to get out of my "oboe bubble" and try to reevaluate everything I am doing with fresh eyes.

For example, let's take the ever-popular issue of playing sharp. You know, the problem that seems like it just came out of nowhere.

First, REALLY think back and remember when you started to notice that your pitch was high. Was there a weather change, or anything really obvious like that?

Ask yourself some other questions.....

When was the last time you bought a knife? How old is your oboe? Is your oboe sealing well?

There are so many little things that can contribute to a larger problem like playing sharp. Luckily, most of the little things are relatively easy to solve.

So while you are trying a new shaper tip, spend some time playing around with how much oboe reed you put in your mouth while you are practicing. What happens to the pitch now? Or compare the pitch of your best friend's brand new oboe to yours.

Even though I still stand by my philosophy of changing only one variable at a time when making oboe reeds, you can still learn a lot of other things in the midst of your one "experiment." Making oboe reeds in a bubble and believing that problems are caused by only ONE factor is a foolproof recipe for oboe reed frustration.

Even if the shaper tip does end up helping your pitch problem, there are lots of other things that YOU can do to improve it as well.

Making oboe reeds really is an ART. If it was as simple as x + y = z = great oboe reed, then ANYBODY could do it. If solving a pitch problem was as easy as just making 74mm reeds, then NO ONE would ever play sharp.

But that just isn't true. Playing the oboe and making good reeds is always a combination of a whole host of factors working together.

It is very similar to being a good healer. If someone comes to you with an earache, you don't (in my opinion) just prescribe drugs for them. You look at the whole person and see what their life is like and how everything in it is working together (or not). It is really the same with making oboe reeds.

There is rarely one easy fix or answer when you take into account everything that an oboist is, and everything his/her reeds are.

Get out of your reedmaking bubble and make sure you get a good view of the larger picture - how everything is working together.

Your oboe reeds and your playing will reap the rewards.

    By Maryn Leister
      Oboist and entrepreneur Maryn Leister helps beginner, intermediate and professional oboists become happier oboe players.
      She is the owner of the oboe learning company MKL Reeds and publisher of the Reed Report and Oboe Success Tips Newsletters. Each newsletter is full of straightforward tips on becoming a better oboe player and on taking control of your oboe reeds.

      Get your free subscription to the Reed Report newsletter and start your own journey towards a more rewarding oboe future right away. Sign-Up now and get your FREE Oboe Reed Tips!
      Article Source:
      EzineArticles


Wednesday, June 21, 2017

Your Search for the Perfect OBOE REED

This might sound crazy coming from someone that owns a reed making business, but the best reeds for you are the ones you'll make yourself. At MKL Reeds and Oboe:Space, we get many questions about finding the ideal reed and what we think the "best" scrape is.

As an oboist, you'll always be striving to make better reeds. But without sounding too zen... the answer is already in you. What you need in a reed is unique and depends upon you, your personality and the way you play. There is no "best" or "right" reed for everyone, no matter who you are.
Even when you make your own reeds, your own definition of the ideal reed should change and evolve with the musical situation you are in.There are a few qualities that MUST be present in a reed, no matter whose it is or where you get it, or even what "kind" of scrape it is.

A good, functioning reed of any kind RESPONDS and is STABLE.
When those 2 core qualities are present, the other benefits that come along for the ride are plentiful. In my opinion, having response and stability (most often) takes care of pitch and even results in helping produce a respectable tone because the reed is both easy to play and is holding together properly.

Oboe Reeds


Before I think or do any kind of detailed scraping, however, my reeds must have these core qualities. It must respond when I want it to and it must hold together no matter where in my mouth I put it or how I choose to blow. Getting to this stage of the game in reedmaking takes skill and practice, but is pretty much the same from reed to reed (assuming I continue to use consistent materials, like shape and gouge, and also that your gouge is good and centered).

I don't know if other reedmakers actually think of reedmaking this way, but I would venture to guess that even without thinking about it, these are the core qualities "everyone" goes for initially. Thinking about RESPONSE and STABILITY first keeps me focused. I strongle recommend not going for any more "detail" until you have these 2 qualities in your reed. This will make sure that you have a strong foundation for a good, consistent, dependable reed. These are the reeds that we strive to sell to our customers at MKL
Reeds.
Now that we've covered the basics, things can get more personal...

The "best" reed for you enters next, when you start applying your own personal tastes, preferences and habits. Unless you find someone who plays JUST like you do and has exactly the same oral physiology and uses their air the exact same way you do (you will never find that person), then the "best" reed for you is the one that you make for yourself.
It's that simple.
Commercial reeds satisfy the basic needs of oboe players, but in most cases can't don't and shouldn't go beyond that. I won't argue that you may find some really great reeds for yourself out there, but I'd still say that even the great reeds you find could be surpassed with your own reedmaking efforts.
So beyond response and stability, what goes into making not just a good, but a really great reed? We'll save the importance of a good gouge for another time, because that is a big topic. But besides having a great gouge, (which in itself is a quest and an art) you need the shape that works for you.

There are tons of things to consider when choosing a shape, and you'll only find what's right for you through experimentation. The right shape for you will "fit" with your gouge and offer you things in a reed that you might never have thought about. You might discover that what feels really good to YOU is to have a reed that is slightly wider, allowing you to feel slightly "under" at first. Then you find either you like that feeling because your air gets you up to pitch perfectly, or you might make a note of this and use this shape for making the "best" reed for playing with that church organ pitched at 438.

You might find a gouge/shape combo that makes amazingly focused, smallish reeds that are "best" for chamber music. There might be yet another combo that makes the most perfect low-register reeds for that second-oboe audition.The possibilities are endless, and this is only one aspect of the freedom you have when making the best reed for you. Finding a gouge/shape combo is very individual and specific to you and your tastes.


Other qualities that change from person to person are how large the opening of the reed is and how much is scraped out of different areas of the reed. Of course, this all comes back to the different physical attributes of each person. Think of all the obvious differences you see from one oboist to another, like height, stature, age, etc.

These differences are important when choosing the best reed for you. Not to mention the many difference you can't see, like the palate, tongue or position of teeth. These are differences that make every oboist sound and play differently.Another important thing that determines the "best" oboe reeds for you is your instrument. You might think, "an oboe is an oboe," but it is really a bit more
complicated than that.When people ask what the best reed is for them, you can't possibly know the age/ quality/type of instrument they are playing on.

I do pretty much stand by my belief that "a good reed is always a good reed," but there are certain qualities of an oboe that necessitate certain qualities in a reed. You'll find it rather hard to find any reed that "responds" on an oboe that is really out of adjustment. Again, who better to make a reed for your oboe than YOU? No one else deals with the trials and tribulations of your oboe everyday, so how could anyone else make the best reeds for it?

Although it is hopefully pretty easy to find and/or make yourself a decent reed, there is so much more opportunity available to you when you start to make your own reeds and experiment with what you need, and what your instrument may require as well. Reedmaking is truly an art, and like any art, it is up to the artist to mold and shape it.

    By Maryn Leister
    Oboist and entrepreneur Maryn Leister helps beginner, intermediate and professional oboists become happier oboe players.
    She is owner of the oboe learning company MKL Reeds and publisher of the Reed Report and Oboe Success Tips Newsletters. Each newsletter is full of straightforward tips on becoming a better oboe player and on taking control of your oboe reeds.
    Get your free subscription to the Reed Report newsletter and start your own journey towards a more rewarding oboe future right away. Sign-Up now and get your FREE Oboe Reed Tips!

    Article Source: EzineArticles


Tuesday, June 20, 2017

How to Practise OBOE SCALES

To practise oboe scales regularly is an important part of learning the oboe. They are an important part of learning any other instrument too. Scales teach us correct fingerings for each key signature, they help us to develop finger sequences and train us to use the appropriate alternative fingering where there is a choice. As we learn and extend our range they are the perfect way to incorporate the high and low notes into our practice so that we can cope with them when we meet them in pieces. As we become more advanced, scales can also form the basis of work on all aspects of technique.

Albrecht Mayer playing the oboe.
(Photo credit: 
Wikipedia)

There are four crucial issues which need to be addressed when practising scales. I will deal with each of those issues in turn.

1) Know the key-signature of the scale you are practising. This may seem obvious, but it is amazing how many students I have taught over the years just tried to 'bumble' their way through without thinking first. As a fellow oboe teacher I worked with many years ago used to tell his pupils, "How do you expect to be able to play in any key where are the notes are jumbled up if you can't play them in simple step order?" This may be a bit simplistic, but it is a good point. So, to reiterate, you cannot possibly practise oboe scales effectively if you are at all unclear about the key-signature.

2) If you are playing scales which use the octave keys, make sure that you are using the right key at the right time. Oboes made for young students usually have separate Octave Keys. The back key is used for the notes E to G# in the second register; the side key is used for top A to top C. If you use the wrong one, or both at once, the notes will be out of tune. However, on an oboe with Semi-automatic Octave Keys, you can keep the back key on whilst adding the side octave key. The very high notes in the third octave are a different issue which I won't deal with here.

3) The use of correct fingerings is also very important in the practice of oboe scales. The oboe does not have many alternative fingerings, especially when compared with the clarinet or bassoon, but the ones we do have must be used when required. Trying to cheat and avoid using them will ultimately backfire on you. As you develop your playing you will find, more-and-more, that you encounter problems which cannot be overcome by cheating. The two principal alternatives we meet on the oboe are the 'Forked-F' and the 'Long D#/Eb' key. Persevere with these alternatives from the start and you will make life much easier for yourself in the future.

4) A number of oboe scales require the player to begin on the lowest notes of the instrument which is often a problem for many. To explore this particular issue in depth would take several pages, but, to state the basic issue, it is all a question of the balance between the air pressure (Diaphragm) and the lip pressure (Embouchure). To sum it up in simple terms, it is all a question of 'more push and less bite!' You need the air pressure to activate the reeAlbrecht Mayer playing the oboe. (Photo credit: Wikipedia)320d, whereas too tight an embouchure will actually stop the reed from vibrating; - result a hiss and no note!

Most aspects of technique can be tackled when you practise oboe scales. During scale practice it is possible to focus on issues such as posture, tone, intonation, etc. etc.


Practising scales can be quite a boring business at times, so the technique most oboists use is the 'little and often' approach. We are told that the human brain much prefers information in 'bite-sized pieces'. Information delivered in this way tends to produce a better response and sticks in the memory better. Rather than trying to practise oboe scales for half an hour at a time, spread 5 or 6 minute 'bursts' of scale work through your practice sessions. I have always found this works very well, both for me and for my students.

So, in conclusion, to practise oboe scales is an essential part of your learning of the instrument. If you avoid them you will stunt your development as an oboist. Perseverance is a critical quality here as the work is never as interesting as playing tunes. Apply the advice above and, hopefully, you will develop a good playing technique which will carry you through all the tricky passages you will meet in your oboe playing life.

    Robert Hinchliffe is a professional oboist, composer, teacher, conductor and music director. This article is based upon over 35 years of both playing and teaching the oboe. If you have found this article helpful and would like to know more, please visit http://www.oboeplaying.co.uk.

    Article Source: EzineArticles


Thursday, May 18, 2017

OBOE REEDS: Learning How to Experiment

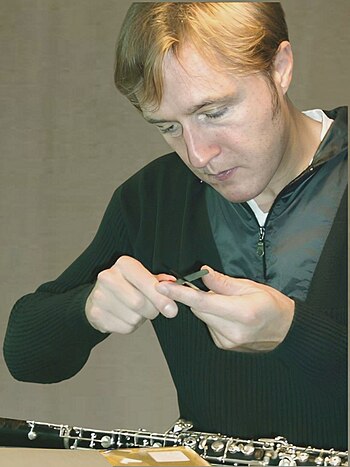
Oboist Albrecht Mayer preparing reeds for use....Oboist Albrecht Mayer preparing reeds for use. Most oboists scrape their own reeds to achieve the desired tone and response
(Photo credit: Wikipedia)

As you may have heard before, being consistent in your reed making helps ensure consistent reeds. A simple but powerful statement indeed.

Reed making is a rather long and varied process, and most successful reed makers would recommend that you do the same thing every time. That way you can slowly make corrections without losing your point of reference.

But what if you want to try something new?

The spirit of adventure definitely has a place in reed making, as long as you have the time (and patience) to do some experimenting. There is so much new equipment available to oboists today that can help (or hurt) your reed making adventures.

There are new kinds of staples coming out all the time, and someone is always introducing either a new gouging machine or shaper tip to the market.

Sometimes it is possible to borrow these new "toys" from friends to try, and other times you may be able to try a shaper tip on loan from a double reed company.

Just remember, don't be afraid to try new things! That's how you learn.

But here is a tip to make your experimenting as productive and efficient as possible:

Whatever you do, don't get too caught up in the frenzy and try to change more than one thing at once.

It may go without saying, but reed making with any new materials at all is just like a science experiment. Remember those days back in lab class?

You never change more than one variable at a time when testing something new.
You want to be able to determine just how the new change affects all areas of the experiment.


Some things you might try:

change the length you tie the cane on try gouging your cane a few millimeters thicker

Try these and many other things! As long as you keep everything else exactly the same, you will have conducted a successful experiment and you will learn something.

It is surprising and fun to see how your reeds will change, and sometimes (hopefully most times) it will be for the better!


    Oboist and entrepreneur Maryn Leister helps beginner, intermediate and professional oboists become happier oboe players.

    She is owner of the oboe learning company MKL Reeds and publisher of the Reed Report and Oboe Success Tips Newsletters. Each newsletter is full of straightforward tips on becoming a better oboe player and on taking control of your oboe reeds.

    Get your free subscription to the Reed Report newsletter and start your own journey towards a more rewarding oboe future right away. Sign-Up now and get your FREE Oboe Reed Tips!

    Article Source: EzineArticles