 |
| Mandolin Banjo - Music-Instruments of the World |


Showing posts with label Banjo. Show all posts
Showing posts with label Banjo. Show all posts
Tuesday, January 30, 2018

Saturday, December 16, 2017
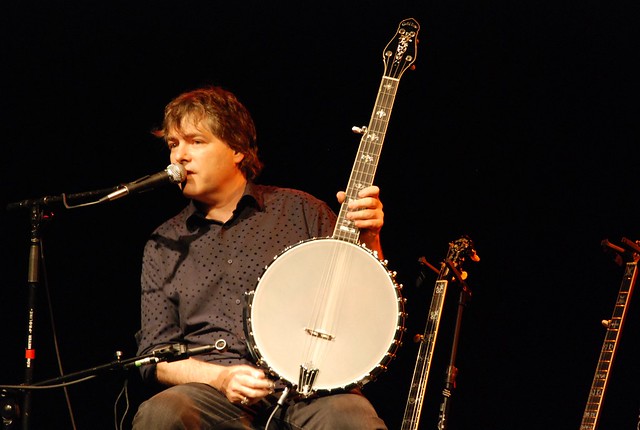
Mandolin, Fiddle, BLUEGRASS Banjo, Clawhammer Banjo - Which One is Easier to Learn to Play
 |
| The Sparrow Quartet in performance. The photo was taken May 24, 2008, at The Asheville Music Jamboree in Asheville, North Carolina, United States. Left to right: Béla Fleck (bluegrass banjo), Abigail Washburn (clawhammer banjo), Ben Sollee (cello), and Casey Driessen (5-string fiddle). (Photo credit: Wikipedia) |
I would love to be able to play the fiddle, but the fiddle is a harder instrument to learn. To be able to join in and play in jam sessions in no time (well, maybe not in no time, but in a reasonable time) you will find the banjo, mandolin much faster to learn. The base fiddle or upright base is another choice to consider and it's easy to learn, but not nearly as much fun as playing the banjo or mandolin.
Between the mandolin, the clawhammer banjo, and bluegrass banjo, they are easiest to learn to play in the order given. That is, the mandolin is the easiest to learn, the clawhammer banjo is next and the bluegrass banjo (with the three-finger picking style) is the hardest of the three. But all three are much easier to learn to play than the fiddle.
The best way to start learning to play one of these instruments is to get your own instrument. You could rent one, but if you rent an instrument, you may find that you are not really committed to learning to play.
You need to start with a good instrument and some of the new low-priced instruments are not your best choice. The good news is that is fairly easy to find good quality used banjos and mandolins on eBay and other online sources. If you live in an area where bluegrass and old-time music is popular, you may be able to get a good deal by checking your local classified ads.
The best way to get a good deal is to be informed. Do your research -- read reviews and check prices and know what banjos and mandolins like what you're looking for are bringing. Check eBay's completed auctions to see what instruments are really selling for -- not just what people are asking for them.
If you have a friend who plays the kind of instrument you're interested in, he or she can be a great asset in helping you find just the right instrument for you. Ask them to look at any instrument you are considering.
By looking at the instrument, realize that looking at the pictures and descriptions on eBay can be as good as (and maybe even better) than actually holding an instrument because on eBay, the seller will point out all of the scratches and defects, whereas when someone hands you an instrument to look at, they are inclined to just hand it to you and comment about how pretty it is and how much they have enjoyed playing it.
The most important part is to do your research, check prices on used instruments and then get your first banjo or mandolin and start learning to play. The banjo or mandolin you choose will probably not be the one you will want to play after you have played for a while, so look to spend a little more than you may have originally thought you would pay. Stay within your budget, but get as good of an instrument as you can afford.
Later you can sell your instrument on eBay or elsewhere and probably get most (if not all) of your money back. In fact, every time I have sold a used instrument I have been able to sell it for more than I paid for it.
How long will it take you to be able to jam with your friends will depend on how much you practice. Practice 15 minutes a day and you will make a lot more progress than trying to play for several hours once a week.
It will take a lifetime to master the mandolin or the banjo, but that is the best part. In my opinion, the banjo and mandolin are two instruments you can learn to play in a reasonable amount of time and then continue learning for years to come.
Jerry Minchey is an engineer, author, researcher and a bit of a musician. He cuts through the hype and gets down to the bare facts to reveal secrets that are easy to understand using non-technical terms. He has written several books and produced DVDs as a result of his research. Article Source: EzineArticles |
Friday, September 22, 2017
A Brief History of the BANJO
Modern banjo-playing has historical roots that go back over 150 years to late 19th and early 20th-century classic banjo styles, mid-19th-century minstrel banjo styles, and even earlier African musical influences.
has historical roots that go back over 150 years to late 19th and early 20th-century classic banjo styles, mid-19th-century minstrel banjo styles, and even earlier African musical influences.
The idea of stretching a skin tightly across a resonating chamber, attaching a neck, adding one or more drone strings, and playing the resulting instrument in a rhythmical and percussive manner originated with West Africans, who were forcibly imported as slaves to the New World. African and early African-American banjos consisted of a gourd or a carved wood body with a stretched skinhead and usually little more than a stick for a neck.
  |
| Photo by MrGaryLarson |
The first banjo-type instruments in the Americas were documented in the Caribbean as early as 1689, and the first mention of the banjo in the American colonies occurred in 1754 (where it is called a "banjer" in a Maryland newspaper).
When Africans and Europeans came together in North America, they had enough similarity in their ideas and attitudes about music for a new musical synthesis to occur despite the dramatically unequal status of black and white populations. In large part, the history of American music, from minstrelsy to jazz, rock 'n' roll to rap music, is the story of this continuing convergence of musical sensibilities.
The mid-19th-century minstrel banjo is one of the first manifestations of the meeting of these musical worlds. Along with the fiddle, the banjo was the most popular instrument in African-American music in the United States through the 18th and into the 19th century. In the early 1800s, white musicians began to take up the banjo in imitation of southern African-American players. By the mid-1800s,
was the most popular instrument in African-American music in the United States through the 18th and into the 19th century. In the early 1800s, white musicians began to take up the banjo in imitation of southern African-American players. By the mid-1800s,
white professional stage performers had popularized the banjo all across the United States and in England and had begun their own banjo traditions as they popularized new songs. Because these musicians usually performed with blackened faces, they came to be known as blackface minstrels.
Because the minstrel stage depicted slaves and southern life in inaccurate and degrading ways, there are many negative aspects to the legacy of blackface minstrelsy. Nevertheless, as part of America's first nationally popular music, minstrelsy served to popularize the banjo and make it an instrument shared by both white and black populations. With this popularity came the publication of the first instruction manuals for the instrument and the first factory-made banjos in the 1840s. Soon after, five strings became the accepted norm for banjos, and five-string banjos are the norm today.
Wednesday, July 26, 2017
5 String BANJO Setup - Making Your Bluegrass Banjo Sound Better
I've been picking 5 string bluegrass banjo for 26+ years, and I've been teaching for many of those years. I've seen many banjos come and go, and I know that the average student needs a couple of pointers for making their banjo sound as good as it can.
for 26+ years, and I've been teaching for many of those years. I've seen many banjos come and go, and I know that the average student needs a couple of pointers for making their banjo sound as good as it can. |
| 5 String Banjo - Photo by deovolenti |
*Important*:
There is no substitution for a nice instrument. It's a fact that a low-end instrument is just harder to learn on. It's tougher to play, tougher to manipulate. If you play a low-end banjo for some time, then switch to a higher quality instrument, you'll be amazed at how much easier it is to play. Most students start out on the cheap instrument to learn with, then switch into the "Cadillac" a few years in. This is backwards. You should give yourself the benefit of learning on something that's easy to play, right from the get-go. Having said that, many people don't have the budget for an expensive banjo, plus they might have an old banjo already in hand, ready to be learned on. This article will help those people. Just don't fool yourself into thinking that we're going to make your cheap, $100 Japanese made banjo sound like a Gibson Mastertone. We'll make it sound better, but we aren't going to turn a Ford Escort into a Cadillac by any means.
Item #1: new strings
Perhaps one of the most dramatic changes you can make to the overall sound of your banjo is to change the strings. This is not tough, and you can do this at home. One big consideration is to watch your string gauge. Most of the string manufacturers label their string sets with words like light gauge, medim light, medium, etc. My recommendation is to go with medium light; you'll find mediums way too tough on your fingers. If you have slight fingers or are young, you might even prefer light gauge strings. You'll have to try different sets to develop a preference.
A good recommended string changing interval is to change the strings after each 8 hours of playing time. And if you are pulling the banjo out of the closet for the first time in many weeks, months, or years, definitely get them changed. Strings corrode, wear out, rust, become dull, etc., even if the banjo is just sitting in the closet. Consult the author's information to contact me with questions.
Item #2: set the bridge
The bridge is that little wooden piece that the strings pass over, just before they reach the end of the banjo. If the bridge is out of place, your banjo won't make the proper notes. The bridge is not fastened down; it's held in place by the pressure of the strings, and it can be moved around. To set the bridge, you'll need an electronic tuner.
Measure the distance from the nut to the 12th fret. Then, make the distance from the 12th fret to the bridge the same. Once this is done, tune your banjo. Once in tune, fret the 1st string (the higher of the two D strings) at the 17th fret, and see what your tuner is telling you. When the bridge is set right, this will be an in tune G note. If the tuner says the note is too sharp, then scoot the bridge back towards the tail piece just a little. Retune, then check again. If the tuner says the note is flat, scoot the bridge towards the neck just a little. Retune, then check again. Keep checking, moving, and retuning until the 1st string, when fretted at the 17th fret, is showing an in tune G note.
*Handy tip*: Once the bridge is set, then each time you do a string change in the future, just do one string at a time so that the bridge doesn't move on you.
Item #3: the head
This is an adjustment that tends to make quite a difference on the overall sound of the banjo. Most beginners are afraid of this one, but there's no need to be. All you need are some nut drivers or sockets, and maybe a screwdriver. It's fairly straight-forward. Coincidentally, the head is the white "skin" that you can play like a drum; the big white circle that makes up the face of the banjo. When the brackets that hold the head tightly work themselves loose, then the head becomes "mooshy" and "tubby" sounding. A crisp, tight head gives you that classic banjo zing!
The first step is to remove the back of the banjo (this is called the resonator.) Most banjos have 4 thumb screws holding the resonator on. Usually no tools are needed to remove these screws. Sometimes, you'll need a screwdriver to remove the screws holding the back on.
Turn the banjo upside down, and notice the "fingers", or brackets, ringing the banjo. At the bottom end of these brackets are bracket nuts. These brackets and nuts are just fancy nuts and bolts; nothing to 'em. Grab your sockets or nut drivers, and figure out which size will fit over your bracket nuts.
Once you have the correct tool, start with one nut and tighten it.
*Important*: don't crank down with all your might! Simply "snug" this bracket. It's possible to spit or crack the head if you crank on these nuts. Snug the nut with very little force, then move to the next one.
Most banjo repairmen say that you should do one nut, then move to the one directly across from it, on the other side of the banjo, and tighten it. Work your way around the banjo, tightening each pair this way. Remember to just barely snug up the nut.
Once you return to the one you started with, you'll likely find it loose again. It's very common to have to make 3 or 4 passes around the banjo before you get everything snugged down. When you have everything crisp and tight, put the resonator back on and enjoy!
In closing
With a little tender loving care, you can squeak some more life out of your old, low-end banjo. I always recommend buying the most banjo you can afford, but reality proves that we'll have to work with what we have available to us. Get your old banjo set up using these simple pointers, and you'll be happier with the overall sound and playability.
"Wunse, I coodn't even spel bango pikker...now I are one!"
My name is Banjo Paul. I'm a banjo teacher, a member of two bluegrass bands, a web designer, and a professional blogger. I have a banjo themed website and blog with lot's of good information about banjos, banjo humor, banjo lessons, banjo kulture...errr...culture...and lot's more. I'd love for you to stop by and say howdy sometime, and as I always say: pick 'em if ya got 'em!
Article Source: EzineArticles |
Sunday, May 28, 2017
A Study In BANJO Lessons
Ah, I remember the good old days when I had my first banjo lesson. Actually, it wasn’t exactly my first lesson. I had been using the internet to improve my “skill” for a while, and I was slightly conceited since I thought I had some idea about what I was doing. I watched videos of a real expert playing the banjo while the tabs were available as well. I learned a few songs and techniques that sounded interesting, but that was about the extent of my knowledge.
 |
| Brooklyn Museum - The Banjo Lesson - Mary Cassatt (Photo credit: Wikipedia) |
When I had my first real lesson, it broke down all those illusions I had of being a decent player. I tried to show off, but as soon as his deep eyes met mine I missed a chord. It was my first time to ever play any instrument in front of anyone, and I didn’t think I would get nervous. After all, I’ve always been a gifted public speaker. The only one in the room was my teacher, and I was having a terrible time.
I’m having a hard time seeing my future in banjo playing, especially since I can’t even whack up the ginger to play something in front of my own teacher. He’s a nice guy, and he can play the banjo like no other. He’s already taught me several exercise I can use for my next lesson. It’s also a great experience just to watch him play, since his skill far outweighs mine. I just hope I will sound at least slightly more decent the next time I have a lesson.
But if I always freeze up when I try to play at my lessons, I’m worried that my instructor will never be able to give me the help I truly need. It’s impossible to get feedback and constructive criticism if everything I play is absolute garbage. I think I will start recording my lone practice and playing it back for him. Hopefully I won’t freeze up just knowing that he will be listening to it soon…
Subscribe to:
Posts (Atom)